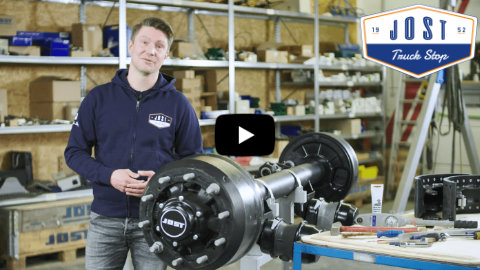
Today we're talking about our trailer axles, more specifically the DMA - our axle series with drum brake. The big advantage of our DMA is the external brake drum. This makes servicing the brakes very easy, because the wheel hub does not have to be dismantled. This saves you a lot of time and your vehicle has a very short downtime. Of course, this means maximum benefit for you! If maintenance work on the brakes is still required from time to time, no problem!
We will show you how to change the drums and brake shoes on the axles of the DMA series:
First of all, check whether the type plate is present and undamaged. Then make sure that the combination brake cylinder is in the release position. Then turn back the slack adjuster. To do this, turn the adjuster screw counterclockwise to reset the wheel brake. Turn the drum to check if it is free. You can then remove the brake drum.
Option A: To remove the brake drum, screw two jacking screws evenly into the drum.
Option B: To remove the brake drum, use two bolts M12x1.75 with a thread length of min. 40 mm and screw them evenly into the drum.
Then lift the brake drum off the wheel hub. Be careful not to damage the threads of the wheel bolts. Then unscrew the forcing screws and dispose of the brake drum. Then you have to remove the dust covers. To do this, first unscrew the upper fastening screws from the dust cover and discard them. Carefully remove the upper dust cover by pulling it upwards. At the same time, also remove the rubber grommet of the ABS cable from the dust cover. Then unscrew the lower fastening screws, discard them and remove the dust cover. Unhook the retaining springs with a suitable tool. Then you can remove the brake shoes. To do this, lift the brake shoe off the brake shoe bolt, pull it towards the stub axle and lay it down. Pull the front brake shoe off the S-cams. Then lift off brake shoe and discard. Then remove all bearing rings from the bearing bolts, dispose of them and put on the new bearing rings and push them on as far as they will go. Apply a thin coat of copper paste to the outside of the bearing rings.
Then you can install the springs. Insert the new retaining spring and hang the new brake shoe return springs in the brake shoes. Then place the new brake shoe on S-cams and the brake shoe bolts. Then place the lower brake shoe at an angle on the S-cams and the brake shoe bolts, bring into position and fix in place. Hook in the retaining springs using a suitable tool. To install the brake drum, first clean the contact surfaces of the wheel hub. Use a wire brush, for example. Then place the new brake drum on the wheel hub and push it on as far as it will go. Then check and adjust the wheel brake. To do this, turn the adjusting screw clockwise until the brake pads are in contact with the brake drum. Then turn the adjusting screw back half a turn and check whether the drum is free to move.
Then you can mount the dust covers. First apply a thin layer of copper paste to the threads of the new fixing screws. Then attach the lower dust cover and screw it in with two new fastening screws. Carefully insert the upper dust cover, also insert the rubber grommet of the ABS cable into the dust cover and screw in the upper fastening screws.
Option A: Tighten the bottom and top mounting bolts with torque wrench.
Option B: Tighten the bottom and top mounting bolts to 40 Nm. (Perhaps better fade in).
Finally, make sure the parking brake is engaged. After you have replaced the brake drum and brake shoes, a function check must of course be carried out. Then you can get back on the road!
